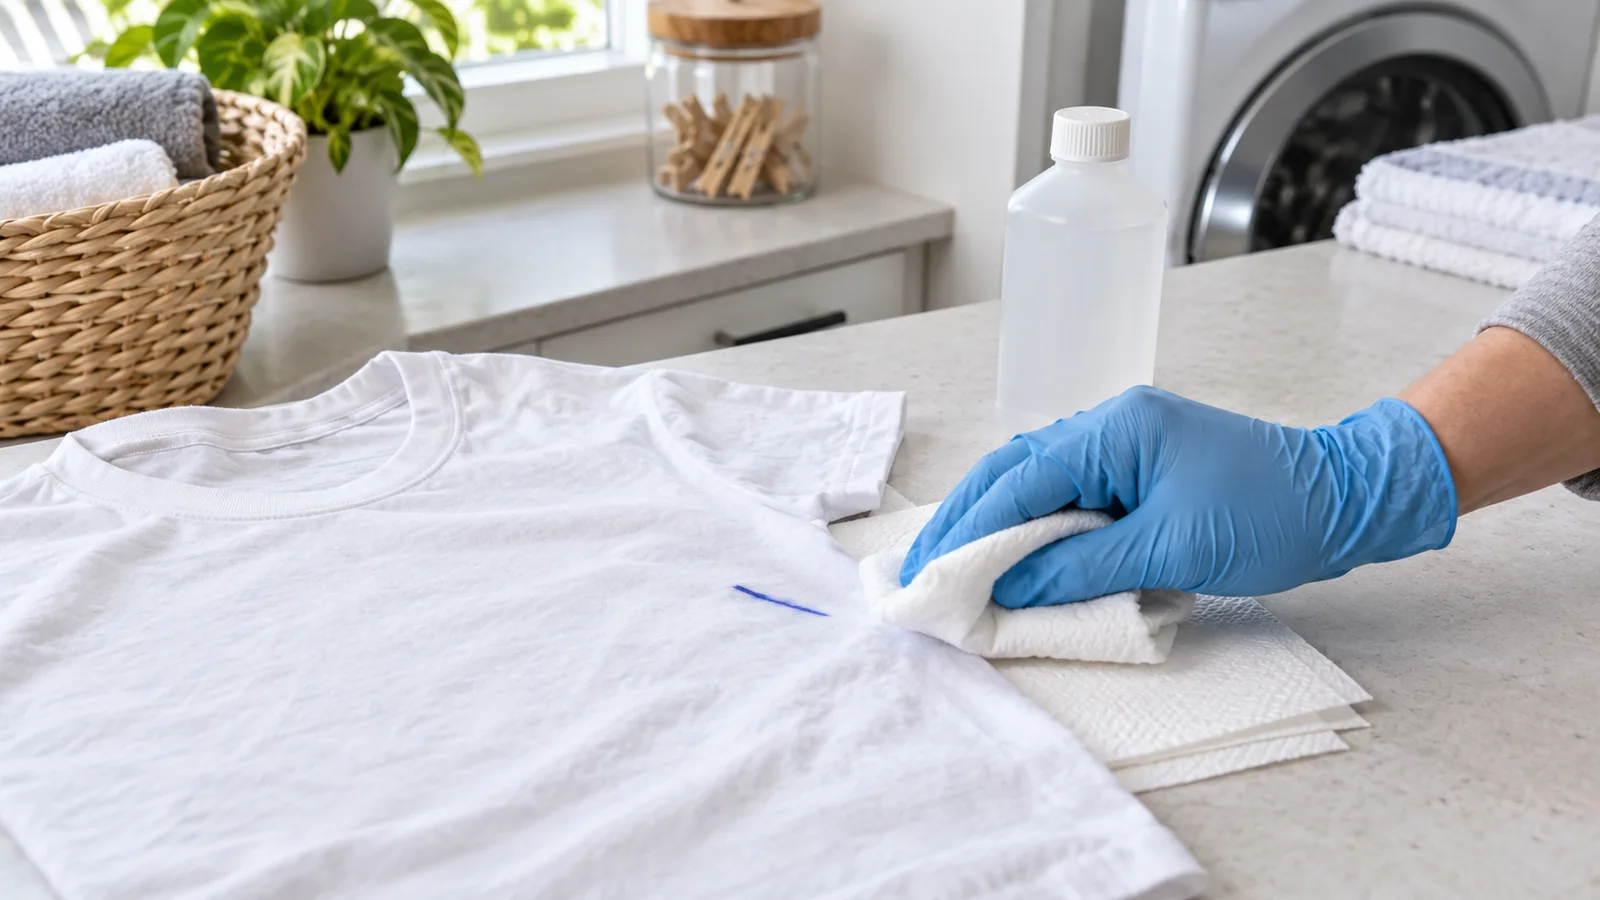
How to Remove Marker From Clothes Without Spreading the Ink
Quick answer
First identify the marker and read the garment's care label. For a washable marker on a washable garment, follow the marker maker's rinse and laundering directions. For an identified permanent ink marker on compatible washable fabric, a face-down transfer method may help, but check the solvent and appliance restrictions before choosing alcohol. An unknown mark, paint marker, or fabric marker is not automatically suitable for that method. Follow the permitted post-treatment route; a quick rinse is not universal clearance for machine laundry. Do not use the dryer until the mark is gone.
Updated October 21, 2026: Clarified marker identification, solvent-to-machine restrictions, protecting garment layers, and when ink-transfer treatment should stop.
Check the machine restriction before using alcohol
GE warns against washing or drying articles previously spotted with combustible substances. Samsung’s laundry safety guidance explicitly includes alcohol. A stain-removal guide’s rinse-and-launder sequence does not override your appliance manual.
Read the exact product and appliance instructions before starting. If the machine prohibits that treatment history, choose a garment-compatible, labeled laundry pretreatment that avoids the prohibited solvent, or consult a cleaner. If alcohol, thinner, remover, or another flammable product has already been used and the next safe step is unclear, keep the item out of both machines and ask the product or appliance maker. Do not use a drying time, a faded stain, or lack of odor as proof of clearance, and never pour solvent into a washer.
Marker is not one stain with one cure. A child's washable marker, an alcohol-based permanent marker, a paint marker, and a fabric marker can require different treatment. The garment matters just as much: a method that is acceptable for sturdy washable cotton may damage a printed, coated, delicate, or dry-clean-only item.
If you cannot identify the marker type—or are not sure the mark is ink—use the clothing stain decision guide before applying alcohol or another ink treatment.
Choose the route before adding a cleaner
| What caused the mark? | Safest first move | Important limit |
|---|---|---|
| Washable children's marker with identifiable brand | Follow that manufacturer's stain directions; rinse and launder only as the garment label permits | “Washable” is a product claim, not permission to ignore the garment label |
| Identified permanent ink marker | Check solvent and appliance restrictions, then use the face-down transfer method only if permitted | Some inks cannot be removed; a passed fabric test does not establish machine-laundry safety |
| Fabric or laundry marker intended to survive washing | Confirm the product; consider professional advice rather than escalating solvents | The ink was designed to stay in fabric |
| Paint marker, metallic marker, or oily industrial marker | Check the marker's ingredients or maker guidance and use a professional cleaner for a valuable garment | Do not guess with acetone or paint thinner |
| Dry-clean-only, leather, suede, silk, wool, embellished, vintage, or high-value item | Keep it out of the washer and show the stain to a professional cleaner | Home solvents can alter dye, finish, adhesive, trim, or texture |
Read the garment, product, and appliance instructions
Check both the garment label and the marker or stain-remover label. The Federal Trade Commission's Care Labeling Rule requires clothing manufacturers to provide at least one regular care method and relevant warnings. If the label says “Dryclean Only,” the garment cannot be safely washed by the normal home method described here.
Next, identify the marker if possible. Look at the barrel, packaging, classroom supply list, or the surface where it leaked. Do not assume every marker sold as washable has the same ink or treatment directions. For example, Crayola publishes a specific hot-water and laundry procedure for its washable markers, while the general ink guidance from the American Cleaning Institute uses a face-down alcohol-transfer method. Apply the instructions to the product they cover; do not combine both routes automatically.
If the marker type is unknown, do not assume it is ordinary permanent ink. Look for the barrel or packaging and distinguish ink from paint, metallic, fabric, or laundry markers. If identification is not possible, ask the maker or a cleaner before choosing a solvent. For a confirmed regular nonpermanent felt-tip marker, ACI advises a cold-water rinse before its transfer treatment, provided the garment permits rinsing.
What to gather for a permitted ink-transfer treatment
- Clean white paper towels or a plain white absorbent cloth
- A second clean white cloth or cotton swabs for controlled application
- Rubbing alcohol only when the product directions, garment compatibility, appliance restrictions, and hidden-area test support the complete planned route
- Liquid laundry detergent or a prewash product allowed by the garment label
- A sink for thorough rinsing
- A drying rack or hanger
- Disposable gloves if you want to limit skin contact
Use white absorbent material so you can see whether ink or garment dye is transferring. Work in a well-ventilated area and keep rubbing alcohol away from cigarettes, candles, pilot lights, sparks, hot appliances, and other ignition sources. Poison Control and NIOSH identify isopropyl alcohol as flammable; keep it in its original closed container when you are not using it.
How to remove permanent marker from washable clothes
1. Protect the work surface
Place several layers of clean white paper towel or a folded white cloth on a surface that alcohol cannot damage. Do not work directly on painted furniture, wood finish, plastic, or a countertop that the solvent might mark.
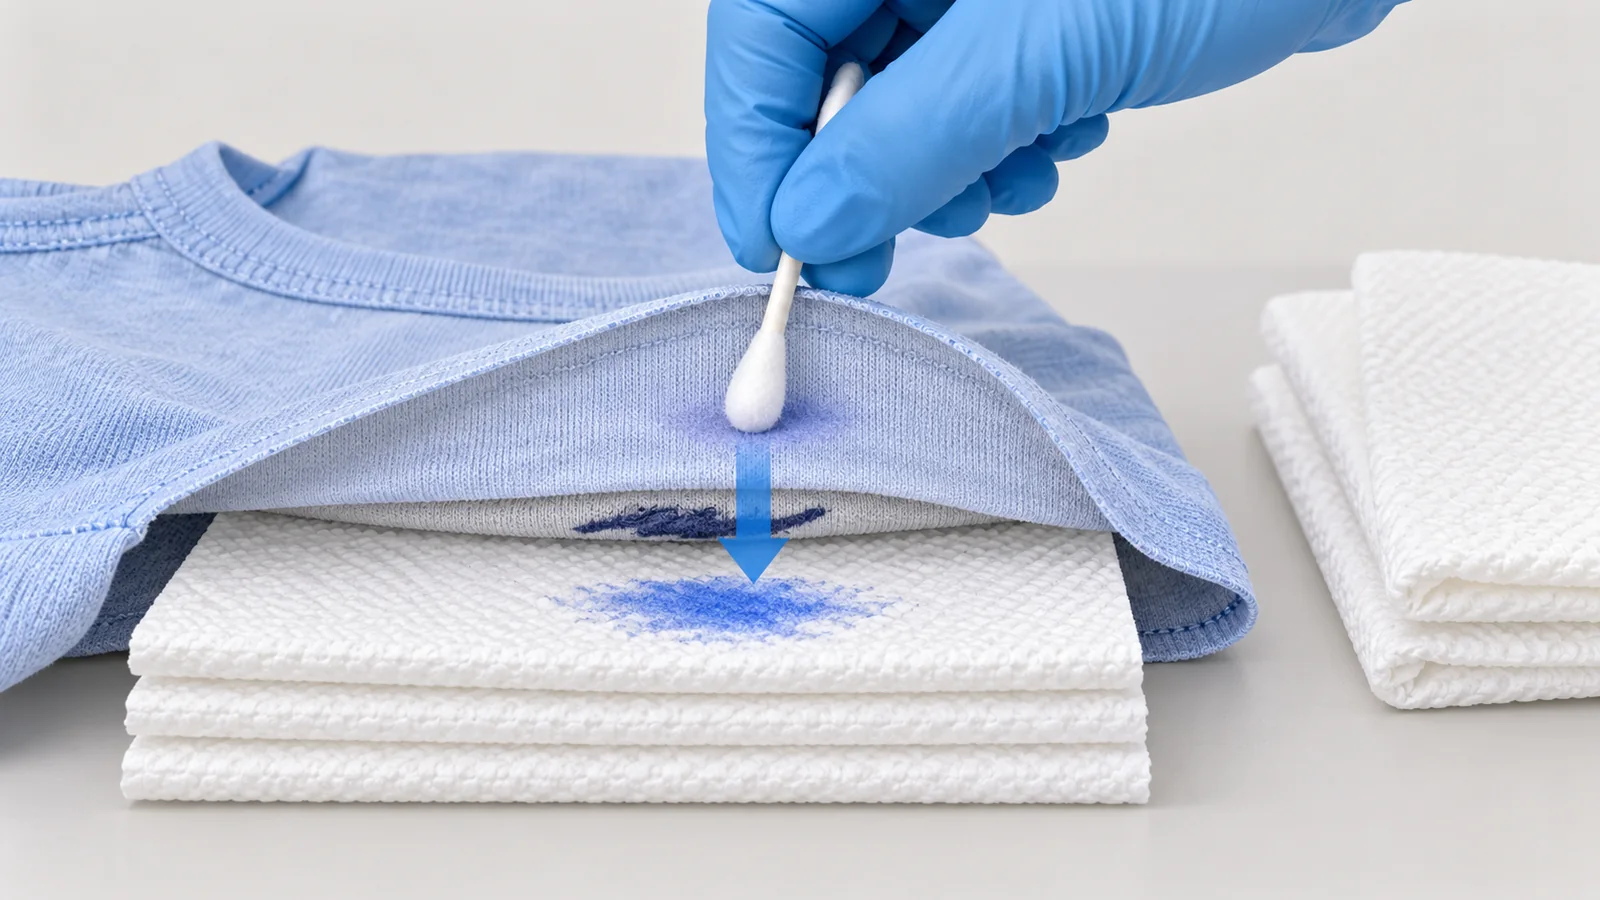
Separate the marked layer from the rest of the garment. Put fresh absorbent material inside a pocket, sleeve, or trouser leg so the stain is not pressed against its clean opposite side; do not unpick a lining to reach it. Turn the stained face down against the absorbent stack, with the clean reverse accessible. Loosened ink should enter the towel, not another garment layer. If several inaccessible layers are soaked, use a cleaner rather than flooding through them.
2. Test a hidden seam
Dampen a cotton swab or corner of a white cloth with a small amount of rubbing alcohol. Touch an inside seam or another concealed area. Blot it with a dry white cloth and let the test area dry.
Compare the fully dry test with untreated fabric. Stop if garment color transfers, the print softens, the coating becomes tacky, or the fabric texture changes. If the garment dye and ink are similar colors and you cannot tell what is transferring, do not treat that uncertainty as a passed test. A successful spot test reduces risk but does not guarantee that a large treatment will be harmless.
3. Work from the back of the stain
If the test is stable, lightly dampen a clean white cloth or swab with rubbing alcohol. Apply it to the back of the stained fabric. Use controlled presses rather than rubbing. The American Cleaning Institute describes this back-to-towel ink transfer. Its general cleaning-fluid option is not permission to substitute paint thinner, acetone, or an unknown solvent, and its laundering step remains subject to the appliance restriction above.
Check the towel underneath after several presses. When ink appears, move the garment to a clean area of the towel. Replace saturated layers so dissolved ink is not pressed back into the fibers.
4. Keep the stain from spreading
Work on a small section at a time. Do not flood the garment, scrub across the mark, or enlarge the wet area unnecessarily. If the ink begins to feather outward, stop adding alcohol and blot the excess onto fresh towels. Do not keep restarting the same spreading treatment. Let the maker or a cleaner advise the next compatible step.
Continue only while color is transferring and the fabric remains stable. Permanent ink may fade without disappearing completely; the American Cleaning Institute notes that some felt-tip and liquid inks may be impossible to remove.
5. Rinse thoroughly
Once little or no more ink transfers, rinse the treated area as the care label permits. ACI calls for a thorough rinse after transfer. This is a stain-removal step, not a universal way to make previously solvent-treated fabric safe for a washer or dryer. Follow the appliance boundary above before planning any machine step. Do not pour bleach, ammonia, peroxide, vinegar, or another cleaner onto fabric that still contains an unknown residue.
6. Choose the permitted next cleaning step
Apply a laundry detergent or prewash stain remover according to its product label. Use only the stated amount and contact time. Machine-wash only when the product directions and appliance instructions permit the complete treatment history. Use the warmest temperature the garment label allows, not automatically the hottest setting. If the manual rules out solvent-treated articles, do not use this step after alcohol; obtain maker or professional advice instead.
Where machine washing is permitted, wash the treated garment separately if loose ink could transfer to other items. If the marker leaked inside a pocket, check both layers before laundering.
7. Air-dry and inspect
For a garment that can safely complete the permitted cleaning route, inspect it after label-approved air drying, away from ignition sources if a solvent was involved. Compare the mark, the surrounding dye, and the fabric texture. Repeat the same compatible treatment only while ink still transfers and the fabric stays unchanged. A shadow with no further transfer, a growing halo, or a stiff or faded area is a stop signal, not a reason to increase the solvent. Keep the item out of the dryer; disappearance of the mark does not remove an appliance restriction.
Stop immediately if the fabric begins to fade, pill, stretch, stiffen, or lose its finish. A faint mark may be safer to accept than permanent fabric damage.
How to treat washable marker
If you can identify the marker, use its manufacturer's stain directions. The word “washable” does not mean every mark disappears in one normal wash, and it does not make every fabric washable.
Crayola's current directions for its washable markers call for rinsing the fabric with hot water until no more color comes out, washing with detergent on a heavy-soil cycle, keeping the garment out of the dryer, and using a specified color-safe soaking product if residue remains. Those directions are evidence for Crayola washable-marker ink, not a universal instruction for every brand or every garment.
If the garment label does not allow the marker maker's recommended temperature or cycle, follow the garment's lower limit or contact the marker maker. Do not “upgrade” a washable-marker treatment by adding alcohol, bleach, and another stain remover together.
What changes after the garment has been washed or dried?
A washed-but-air-dried mark may allow another compatible attempt. Recheck the marker and any earlier treatment; rinse and rewash only when the garment, product, and appliance instructions permit that route. Use a clean towel each time so you can tell whether color is still moving.
A machine-dried mark is harder to remove. Recheck marker identity, fabric condition, and the solvent-to-machine boundary before considering the same transfer method. More attempts are reasonable only while there is visible progress without garment damage; do not move to acetone, paint thinner, or mixed chemicals. Professional cleaning is the safer next step for a valuable item.
Fabric and construction limits
Cotton and washable linen
Sturdy, colorfast cotton and linen usually tolerate controlled rinsing and laundering better than delicate materials, but prints, dyes, coatings, and trims can still react to alcohol. Test first and follow the complete garment label.
Polyester, nylon, and spandex blends
Synthetic fibers may be washable, but the garment can also contain heat-sensitive stretch fibers, prints, adhesives, or finishes. Do not assume a synthetic item can take a hotter wash. Test the solvent and use the care-label temperature.
Wool, silk, rayon, acetate, and embellished garments
Do not apply a generic alcohol or acetone method to an unfamiliar delicate fabric. Water, agitation, and solvents can change dye, hand, shape, lining, trim, or adhesive. Follow the label and tell a professional cleaner exactly what kind of marker caused the stain if you know.
Leather, suede, coated, or waterproof fabric
These surfaces rely on finishes that a solvent can strip or cloud. Use the manufacturer's care guidance or a material specialist. Do not treat a coated rain jacket like an ordinary cotton shirt.
Methods to avoid as a default
| Method | Why it appears online | Why it is not the default here |
|---|---|---|
| Acetone or nail-polish remover | It can dissolve some permanent inks | It can also remove garment dye or damage acetate, coatings, prints, adhesives, and trim |
| Aerosol hairspray | Older formulas often contained useful alcohol | Modern formulas vary and can add fragrance, oils, polymers, or other residue |
| Alcohol hand sanitizer | It may contain alcohol | Gels also contain thickeners and skin-conditioning ingredients; plain rubbing alcohol is easier to apply and rinse in a controlled test |
| Chlorine bleach | It can remove some remaining color on compatible white fabric | White does not mean bleach-safe; bleach can damage fibers and must never meet ammonia, acids, or unknown residues |
| Ammonia mixtures | Some branded guides use a measured product-specific ammonia soak | It creates a dangerous mixing risk if bleach or an unknown cleaner is present and is unnecessary for a safe first method |
| Scrubbing with a brush | Friction seems faster | It can spread ink, roughen fibers, and damage a print before the stain transfers |
Use one label-supported method at a time. Rinse as directed before changing products. Never mix bleach with ammonia, vinegar, acids, or an unknown cleaning residue.
When the marker will not come out
First confirm that ink, rather than garment dye, was transferring and that progress has now stopped. A remaining shadow may be permanent pigment rather than removable wet ink. Repeated solvent treatment can create a faded halo that is more visible than the original line.
Use a professional cleaner when:
- the garment is dry-clean-only, delicate, vintage, embellished, structured, or valuable;
- the marker is an industrial, paint, metallic, or fabric marker;
- the hidden-seam test changes the garment;
- a large leak soaked several layers;
- the stain sits on a printed logo, waterproof coating, bonded seam, or adhesive-backed trim; or
- home treatment has stopped transferring ink but the mark remains unacceptable.
Tell the cleaner what you already applied. That information helps avoid incompatible follow-up treatment.
Prevent marker stains from spreading in the wash
- Cap markers before placing them in a pocket or bag.
- Check children's pockets and craft aprons before laundry.
- Keep permanent and washable markers in separate labeled containers.
- Do not wash a garment while a marker remains inside a pocket.
- Treat the stain before it joins a full load.
- Keep the item out of the dryer until you have inspected it in good light.
Related laundry guides
- How to Remove Paint From Clothes Without Setting the Stain
- How to Remove Chocolate Stains From Clothes
- How to Remove Detergent Stains From Clothes