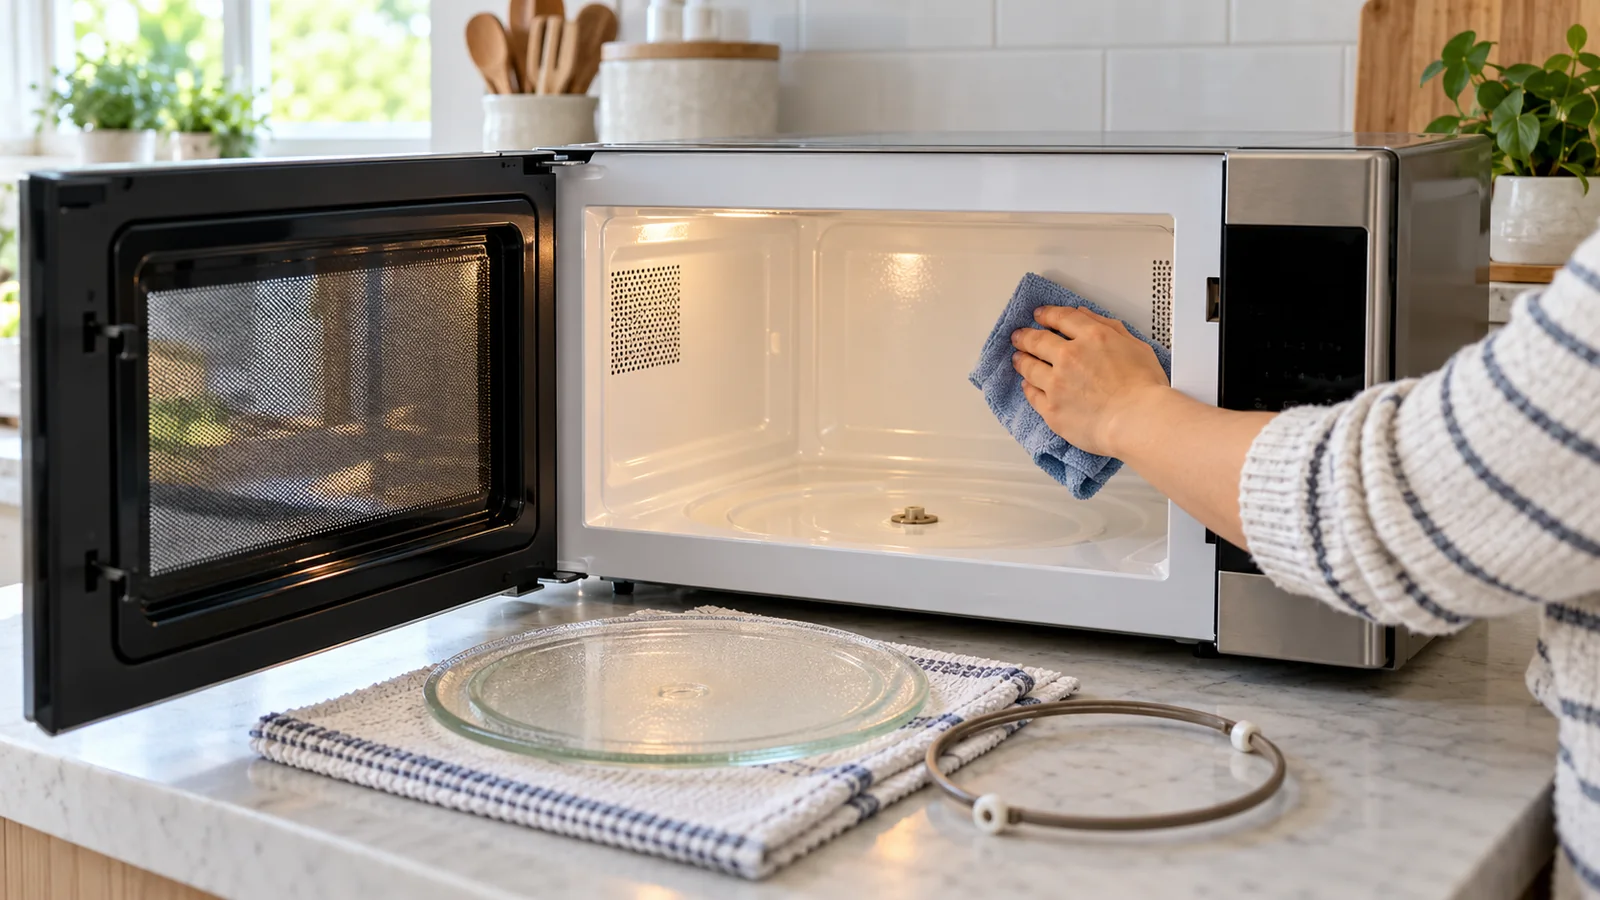
How to Clean a Microwave Safely: Interior, Turntable, Door, and Vents
Quick answer: Switch the microwave off, let the cavity and glass tray cool, and check for damage. For hand-wiping and part removal, use the manual’s power-disconnection method; unplug an accessible countertop unit with dry hands and safe, dry access. Control Lock prevents accidental button presses but does not disconnect power. Wash removable parts and wipe the cavity with the model-approved mild-soap or water method. Steam is optional: use only the appliance’s specified procedure, with all required cooking parts refitted, then cool and disconnect again before wiping. Keep liquid out of vents and control seams. Clean a reusable grease filter only as the manual directs; replace a charcoal filter rather than washing it.
A useful microwave clean has three separate jobs: the food cavity, the removable turntable parts, and—on over-the-range models—the ventilation filters. Treating all three as one “lemon steam hack” misses the filter and can hide damage that should stop the appliance from being used.
Updated October 22, 2026: separated powered steam-cleaning from disconnected hand-cleaning, clarified hot-water precautions, and added reassembly and stop-use decisions. The component-location illustration added October 20 is retained.
Inspect and disconnect safely · Check the optional steam route · Check before reuse
Pick the right cleaning route
| What you see | Best first move | Why |
|---|---|---|
| Fresh splatter | Wipe after the appliance cools | It is easier to remove before it becomes a film |
| Dried food on cavity walls | Start with compatible hand-wiping; use steam only by the model’s instructions | Moisture reduces scrubbing pressure on the coating |
| Greasy underside on an over-the-range unit | Identify the removable grease filter | Cavity cleaning does not clear the ventilation path |
| Persistent cooking odor with a clean cavity | Check the grease and charcoal filter schedule | Many charcoal filters are replace-only |
| Peeling interior, burned waveguide cover, cracked door, arcing, or sparks | Stop using the microwave and request service | Cleaning cannot make damaged shielding or door parts safe |
Time estimate: 15–25 minutes of active cleaning, plus any approved cycle, cooling, and complete filter drying. Difficulty: easy for the cavity, moderate for model-specific filter access. Supplies: microwave-safe bowl, water, mild dish soap, soft cloth or nonabrasive sponge, dry towel, and the manual for filter and turntable guidance.
Stop-use boundary: Do not operate a microwave with a damaged door, latch, seal, cavity coating, waveguide cover, power cord, or plug. Stop after sparks, repeated arcing, smoke, or an electrical odor. Never remove the outer cabinet: high-voltage components can retain a dangerous charge even after the appliance is unplugged.
Water near electricity: do not touch a wet plug, outlet, cord, controls, or appliance, or reach across water to unplug it. Keep clear and get qualified help with safe isolation. If cleaning liquid entered the vents or controls, do not restart the microwave just because the outside feels dry. Hawaiian Electric’s household safety guidance warns against touching faulty appliances and cords while wet and advises unplugging before cleaning.
Fire is not a cleaning problem: if you suspect a fire inside, keep the door closed and turn the microwave off only if you can do so safely. USFA says not to open the door until a microwave fire is out. If fire or smoke threatens you, leave and call 911 from safety; do not stay to inspect, carry, or clean the appliance. Have it checked before reuse after a fire.
Step 1: cool, disconnect, and inspect
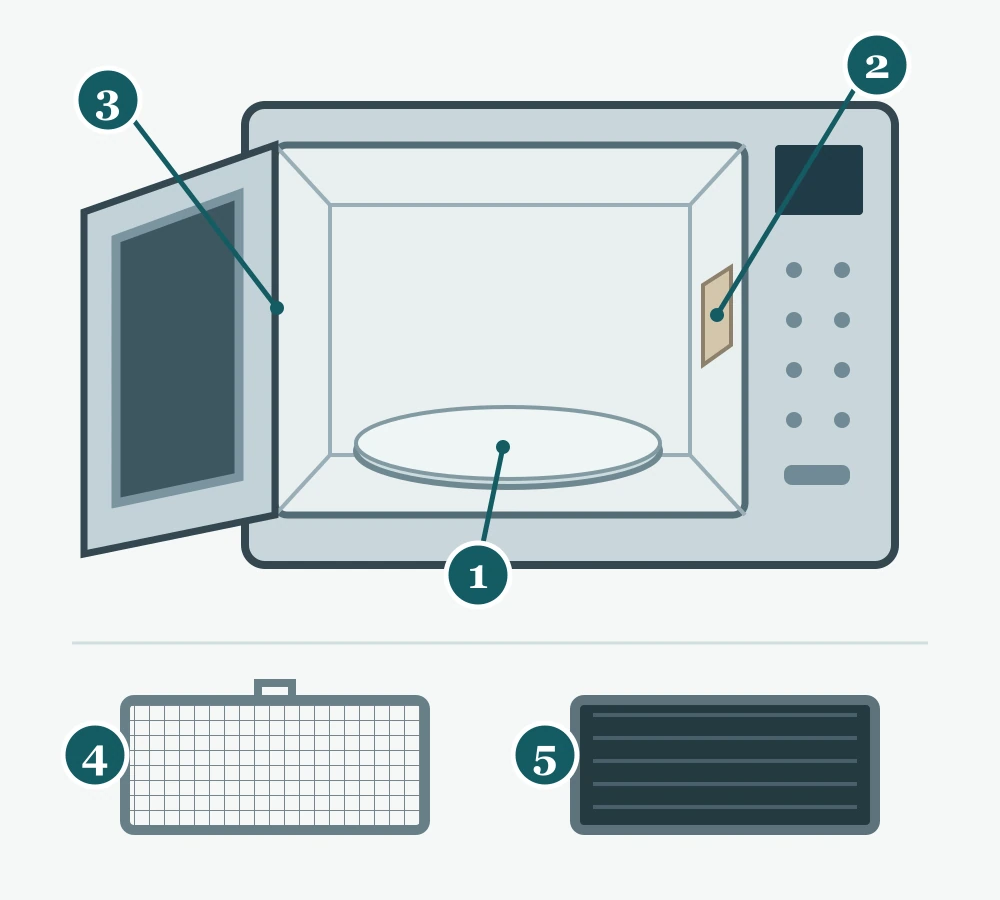
- Turntable and roller ring: let the glass cool, then remove and wash only the parts the manual permits.
- Waveguide cover: a small panel on an interior wall or ceiling. Leave it in place; do not saturate or scrape it.
- Door-to-frame contact area: wipe gently and keep liquid out of openings. Damage to the door or latch needs service.
- Metal grease filter: usually beneath an over-the-range model. Wash only by the model-approved method and dry completely.
- Charcoal filter: often behind an over-the-range vent grille. Commonly replace-only; confirm the correct part and access procedure.
- Remove food and let the glass tray cool completely. Whirlpool warns that a hot tray may shatter if placed in water.
- Before hand-wiping or removing parts, disconnect power as the model manual directs. Unplug a countertop unit only with dry hands and safe access to a dry, undamaged plug and outlet. For a built-in or over-the-range unit, use its specified isolation method; do not pull a mounted appliance out or open its cabinet to find a connection. Control Lock is not electrical isolation. If access or the required method is unclear, stop and ask the manufacturer or a qualified technician.
- Look at the door, latch hooks, seal area, cavity ceiling, and the small waveguide cover—often a mica or plastic-looking panel on an interior wall. Do not remove or saturate that cover.
- If the interior coating is flaking, metal is exposed, or the waveguide cover is scorched or perforated, stop. Photograph the model label and damaged area for the manufacturer or a qualified appliance technician.
Step 2: remove and wash the turntable parts
If your model has a removable glass tray and roller ring, lift them out as its manual shows once fully cool. A flatbed or differently supported model may not have these parts; do not pry at a fixed cavity floor. Wash both with warm, mild soapy water and a soft cloth. Use the dishwasher only if the exact manual says the parts are dishwasher-safe. Clean crumbs and sticky residue from the cavity floor and the track where the roller ring sits.
Dry every piece and reinstall the ring, hub, and tray in their model-specific positions before any powered steam step or normal cooking. The tray must sit on its drive correctly, not wobble on top of it. Do not run a turntable model with its required tray removed, and do not test rotation with an empty cavity. If a part is chipped, cracked, or will not seat, obtain the matching replacement instead of improvising a support.
Step 3: use steam only when the model permits it
Fresh food splatter often needs only compatible hand-wiping. For dried food, use the named Steam Clean function or bowl-of-water procedure in your exact model’s instructions. Whirlpool and Samsung publish different water amounts, vessel sizes, heating settings, and standing periods. Do not combine their recipes or turn a general time range into permission to keep heating until you see bubbling. If you cannot confirm a suitable procedure, stay with the approved damp-cloth route and ask the maker about stubborn deposits.
- Prepare the appliance for a powered cycle. Remove cleaning cloths and tools, refit the required dry turntable parts, and confirm that no cleaner was left in the cavity. Restore power only with safe, dry access and only if the inspection found no fault.
- Use the complete model-approved water procedure. Choose its specified microwave-safe container, water amount, power, and heating time. Never heat a sealed container, run the bowl dry, exceed the time, or substitute a cleaning chemical.
- Respect the standing and cooling instructions. Keep the door closed for the specified standing period. Water can remain dangerously hot without looking as if it is boiling; do not immediately lift, stir, or add ingredients to it. Keep children away.
- Handle the bowl only when safe. Open carefully with your face away from steam and use dry oven mitts. Do not lean over the bowl. Wait for safe handling rather than guessing from a lack of bubbles.
- Return to the hand-cleaning state. After the cycle, bowl, tray, and cavity have cooled enough for safe handling, remove the bowl, switch off, and disconnect by the safe method above before reaching in to wipe. Do not reach over hot water to a plug.
FDA warns that overheated water can erupt when disturbed even if it does not appear to be boiling; follow the manual’s water-heating limits rather than extending a cycle to chase visible steam. Do not add a spoon, sugar, or another ingredient afterward as a home workaround. Lemon or vinegar can add odor control on models whose manufacturer permits it, but fragrance is not proof that food film is gone. Water and mild dish soap remain the main cleaning route. Never combine cleaners or heat a chemical product unless its label and the microwave manual explicitly direct that use. Do not apply this steam-cleaning method to a pop-up toaster. For crumbs inside bread slots, follow the unplugged toaster-cleaning steps instead; water must not enter the toaster body.
Step 4: wash, rinse, and dry the cavity
- With power disconnected, put the model-approved mild soap solution or water on a soft cloth, not directly into the microwave. Wring it out so liquid cannot run into openings; use no abrasive pad or sharp scraper.
- Wipe the door-to-frame contact area carefully; Whirlpool’s maintenance guidance says this area should be kept clean.
- Use a fresh damp cloth to remove soap film so steam cannot pick up cleaner residue during later cooking.
- Keep liquid out of vents, the control panel, fan openings, the waveguide cover edge, and the turntable drive opening.
- Dry the cavity and leave the door open briefly only if the manual allows it and the appliance is supervised.
Step 5: clean the exterior by finish
| Exterior part | Starting method | Avoid |
|---|---|---|
| Painted or plastic body | Soft cloth with mild soap and water, then dry | Abrasive powder, solvent, or soaking seams |
| Stainless steel | Approved cleaner on a cloth; wipe with the grain | Applying stainless cleaner to glass or controls |
| Door glass | Soapy water or approved glass cleaner on the cloth | Spraying directly toward vents or the door seal |
| Touch controls | Follow the manual’s power-isolation method, then wipe with a barely damp cloth; Control Lock alone is not isolation | Excess liquid or pressing several controls while wiping |
Over-the-range filters: wash one, replace the other
Over-the-range microwaves commonly use a reusable metal grease filter underneath and may also use a charcoal odor filter behind a vent grille. They are not interchangeable.
- Metal grease filter: first let the microwave and the cooktop below it cool, clear the work area, and disconnect power by the safe model-approved method. Remove only the owner-removable filter. Use its specified washing or soaking method, brush gently if permitted, rinse, and dry completely before refitting. A metal appearance alone does not establish dishwasher or cleaner compatibility. Whirlpool recommends monthly cleaning for its over-the-range grease filters.
- Charcoal filter: do not wash it. Replace it with the correct part and orientation on the schedule in the manual. Whirlpool gives six months as a general interval for its models, but cooking volume and model guidance can differ.
- Damaged filter: replace a torn mesh, bent frame, missing tab, or filter that will not lock securely. Grease bypassing the filter can enter the vent system.
If the owner manual authorizes filter access behind a screwed-on vent grille, isolate power first, support the grille, and retain the original fasteners. Do not loosen an installation bracket or the outer cabinet. Stop if access would expose wiring or if the manual treats the part as non-user-serviceable.
Burnt odor, smoke, or sparks: what the clean tells you
| After cleaning | Likely next check | Action |
|---|---|---|
| Food odor remains | Hidden splatter, roller track, grease filter, charcoal filter | Clean or replace the correct component |
| Tray chatters or does not turn smoothly | Ring alignment, debris, damaged wheels or hub | Re-seat parts; replace damaged model-specific parts |
| Sparks return with approved cookware | Burned food, metal fragment, damaged waveguide cover or exposed cavity metal | Stop use and request service |
| Electrical smell or smoke from a clean empty unit | Possible electrical fault or fire, not a cleaning diagnosis | Stop use; follow the fire or wet-electrical boundary above. Disconnect only with safe, dry access and arrange service |
The clean-and-ready test: use, reclean, or stop
Before restoring power, finish the product’s residue-removal instructions and dry the cavity, door-contact surfaces, removable parts, and exterior. Refit the required tray/support, dry filters, and any user-removable vent grille with their correct parts and fasteners. The door must close normally without being forced; never bypass or adjust its latch to make it work. A clean appearance is not an electrical or radiation-safety test.
- Complete, dry, and undamaged: restore power with safe, dry access. For the next normal use, follow the manual with food in suitable microwave-safe cookware; do not run it empty to “burn off” cleaner or prove the tray works. Stop if abnormal noise, sparks, smoke, or an electrical smell occurs.
- Food or soap film remains: keep it disconnected for another compatible wipe-and-rinse pass, then dry. Do not compensate with stronger chemicals or repeated heating. Persistent cooking odor calls for checking the correct filter and hidden food areas—not masking the smell.
- Damage, internal liquid entry, poor seating, a door fault, or repeated arcing remains: leave the microwave out of service and contact the maker or a qualified appliance technician. Supply the model number and what happened; do not reconnect it merely to demonstrate the fault.
Related kitchen guides
- Remove kettle scale without leaving cleaner residue
- Choose between manual, Steam Clean, and Self Clean oven routes
- Trace a kitchen-sink odor before adding cleaner
Sources
- Samsung — How to clean a microwave
- Whirlpool — How to clean a microwave
- Whirlpool — Cleaning grease filters and replacing charcoal filters
- LG — Microwave cavity, turntable, and exterior care
- FDA — Microwave water-heating and door-safety precautions
- Hawaiian Electric — Dry-access and unplug-before-cleaning precautions
- USFA — Keep a microwave fire contained behind a closed door
Component-location illustration and filter key added October 20, 2026. Power-state sequencing, hot-water precautions, and pre-use decisions updated October 22, 2026. Cleaning cycles, removable parts, filter access, and approved products vary by model; follow the current manual for your microwave.